Learn how to manage the NexaInsights on-call calendar yourself with our comprehensive tutorial. Enjoy more productivity with your personalized calendar.
A lot of our clients know about the NexaInsights app and portal. While you’re using them on a daily basis, not everyone knows that you can manage the NexaInsights on-call calendar yourself! While our Customer Success is always happy to help you configure your on-call calendar, it’s easier than ever for you to set up your own scheduling.
Benefits of managing your own on-call calendar
- You can manage live updates as they happen
- You can schedule in advance
- It saves you time
- You can always stay in the loop
- You can handle emergency dispatch and on-call employees
- You have more after-hours control
All of that sounds good, but how exactly do you get started managing your own on-call calendar? Let’s walk through the steps.
THE ON-CALL PROCESS: STEP 1
- Contact your Account Specialist to enable OnCall calendar & obtain credentials You won’t be able to set up your calendar without your account specialist, so make sure to let us know you’re interested
- Your Account Specialist will configure your calendar based on your specific business needs
- Sign in to the NexaInsights portal

NexaInsights: How to Manage the On-Call Calendar Yourself
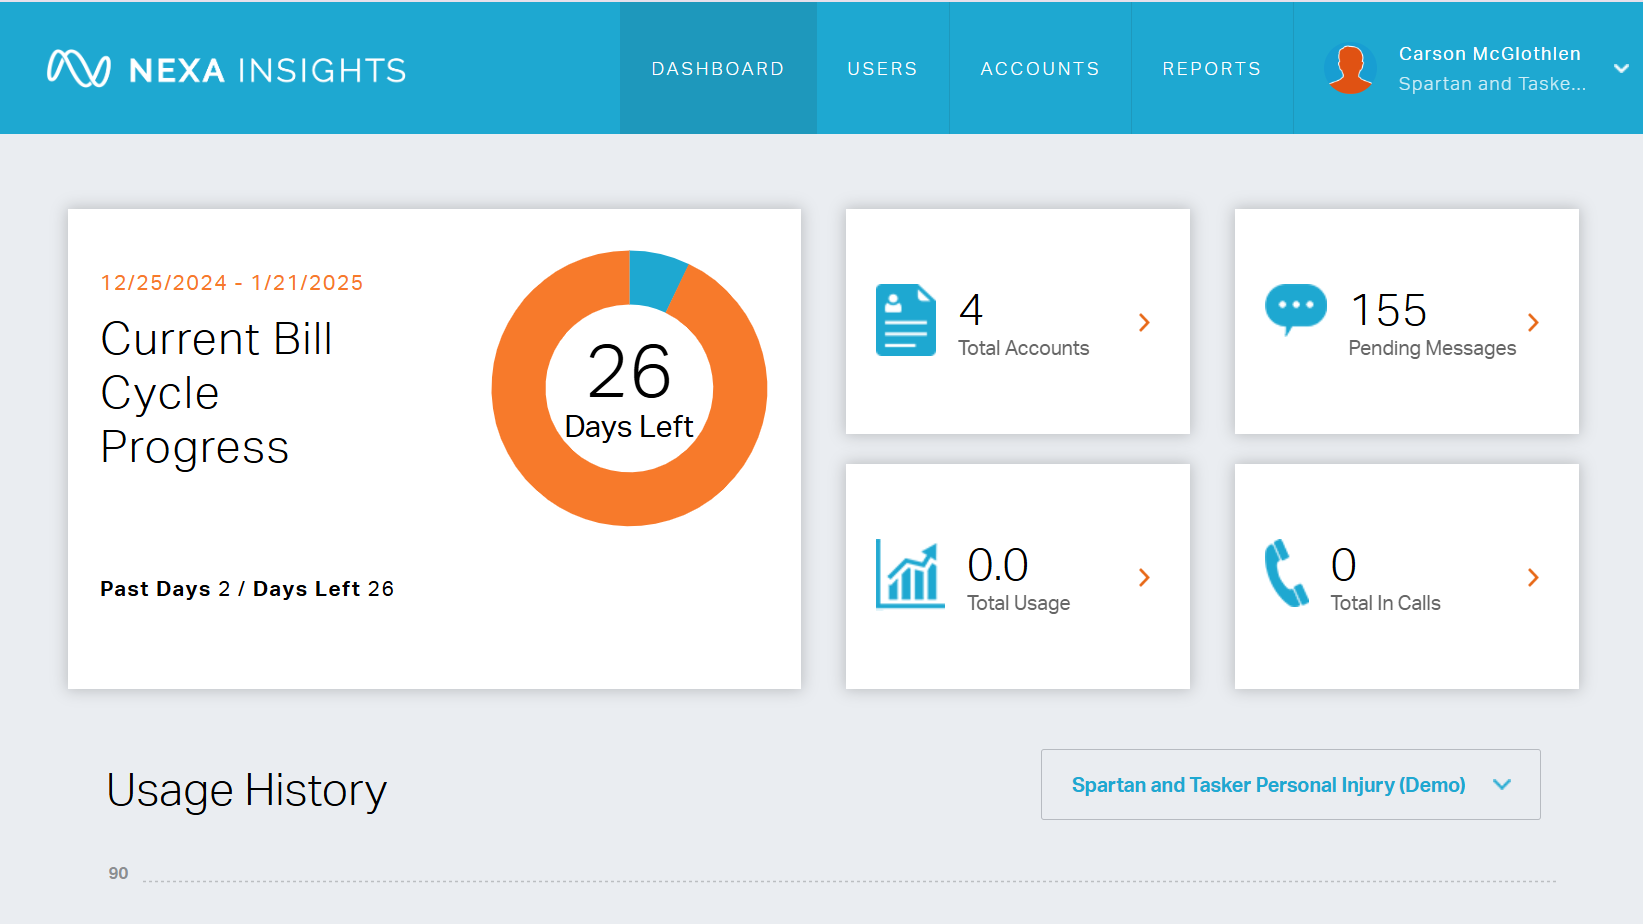
- Go to Dashboard
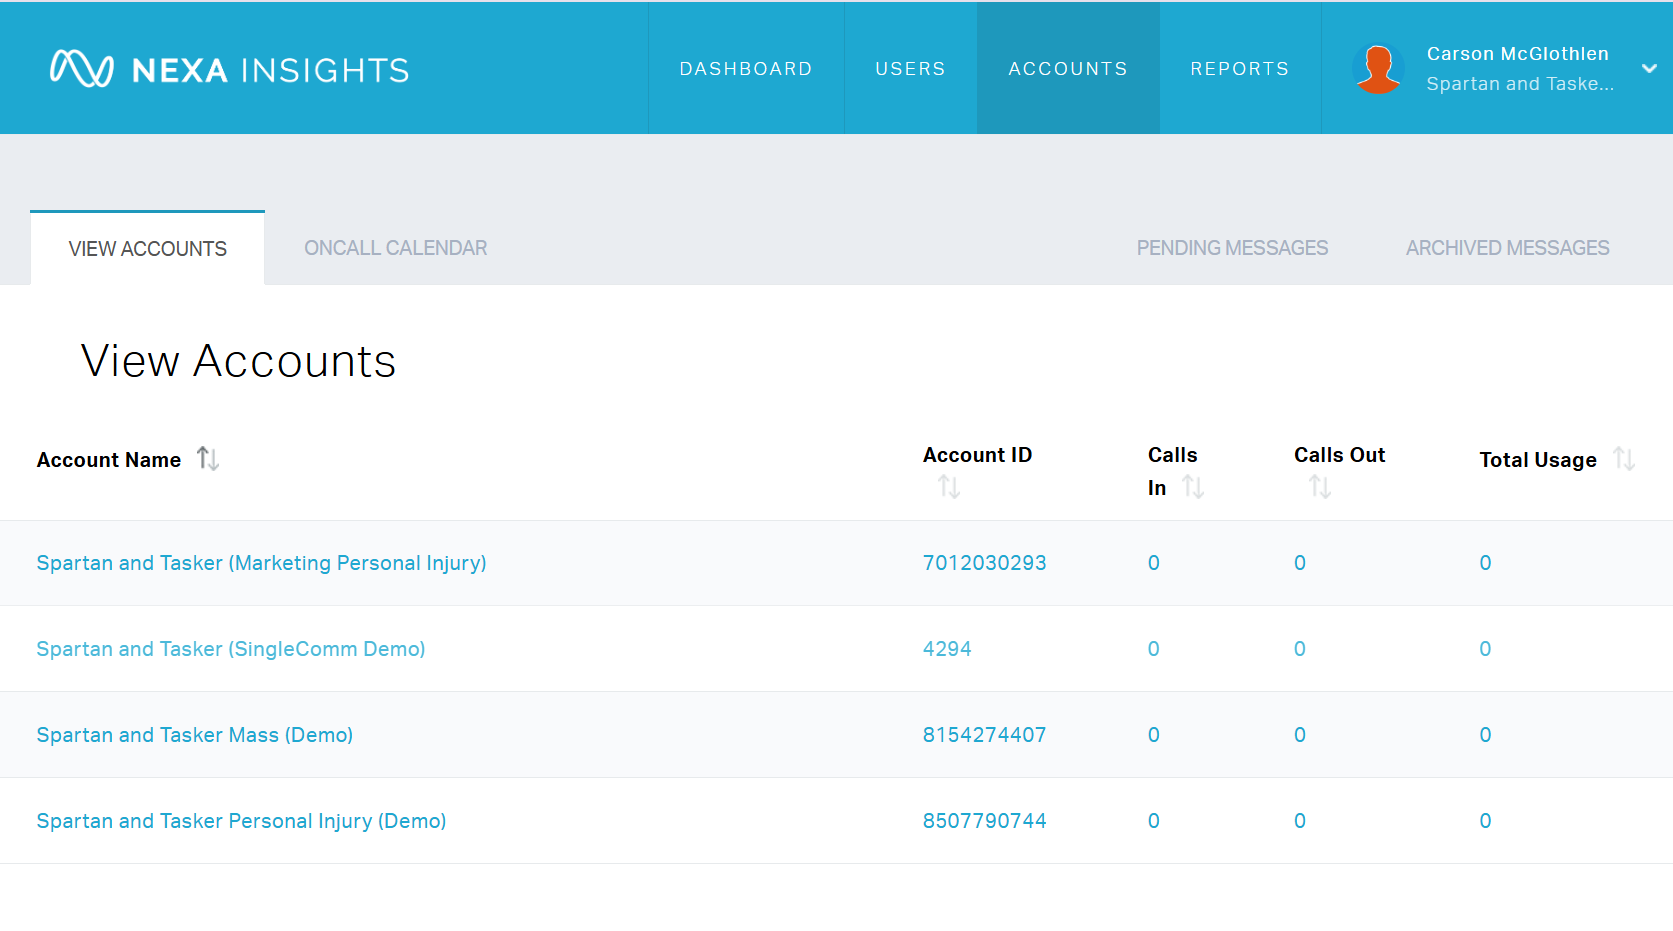
- Go to Accounts
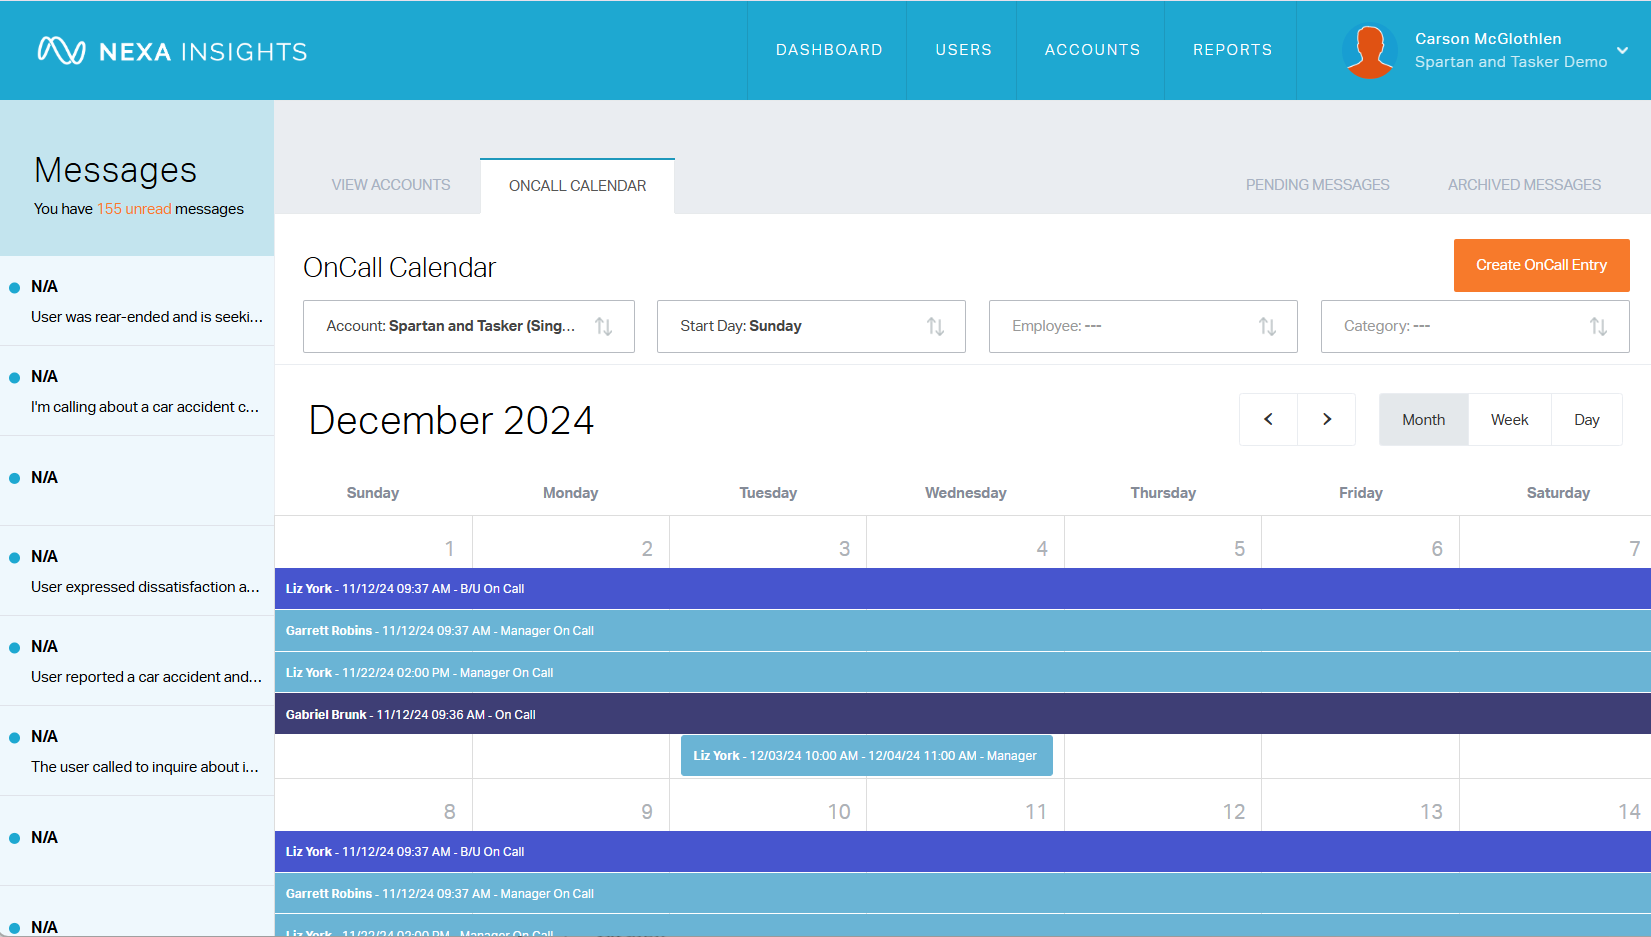
- Go to OnCall Calendar
THE ON-CALL PROCESS: STEP 2
To Add an Entry:
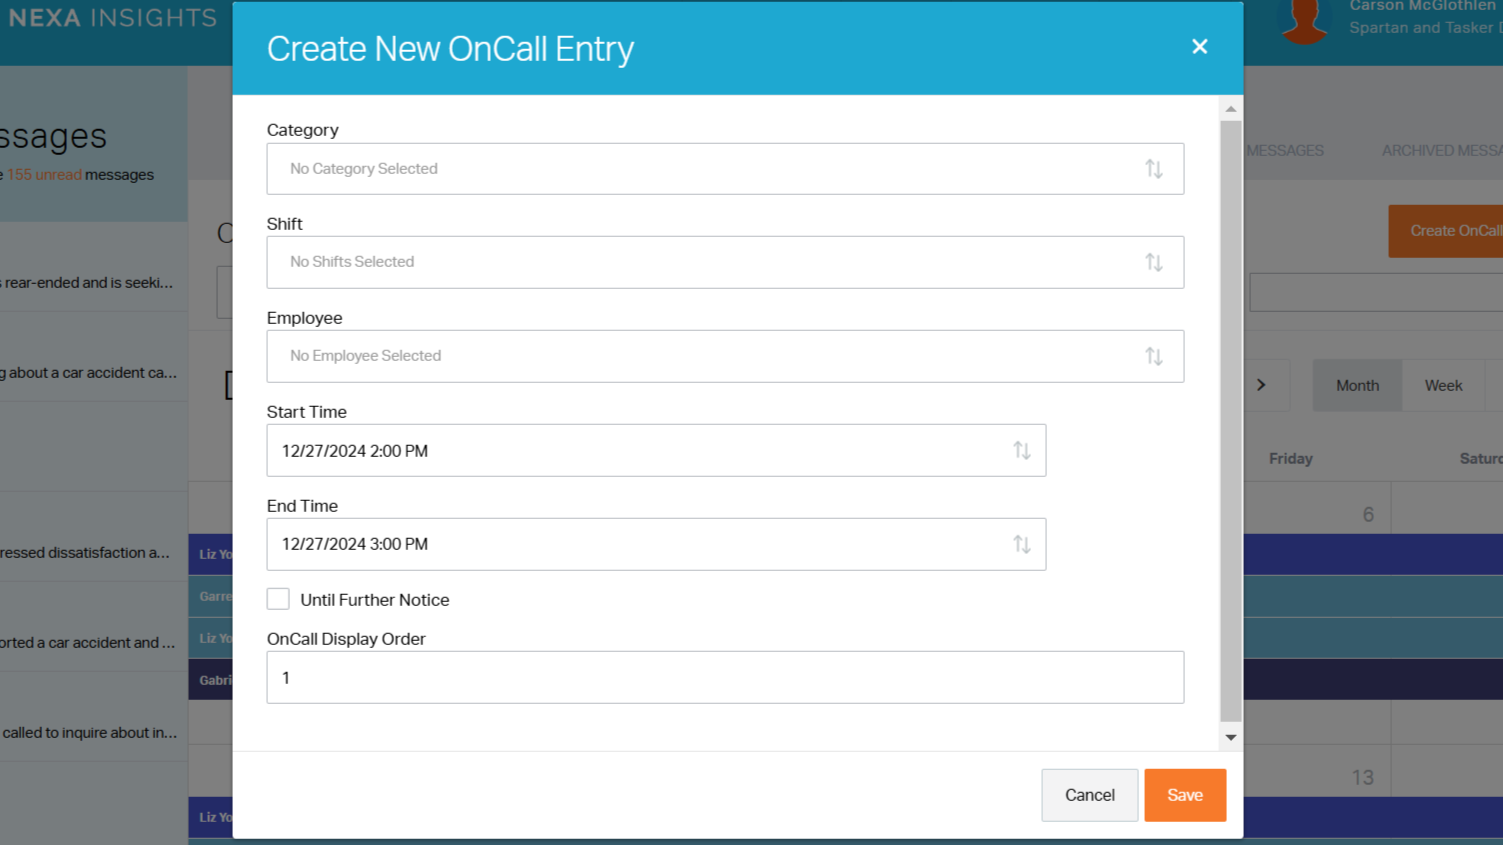
- Click Create OnCall Entry button or Click on Date
- Choose correct category
- Choose shift time
- Select employee
- Designate start and end time
- Using a pre-defined shift will auto-populate start & end time
- Doublecheck end time is correct
THE ON-CALL PROCESS: STEP 3
Adding an entry, continued:
- Adjust OnCall Display Order
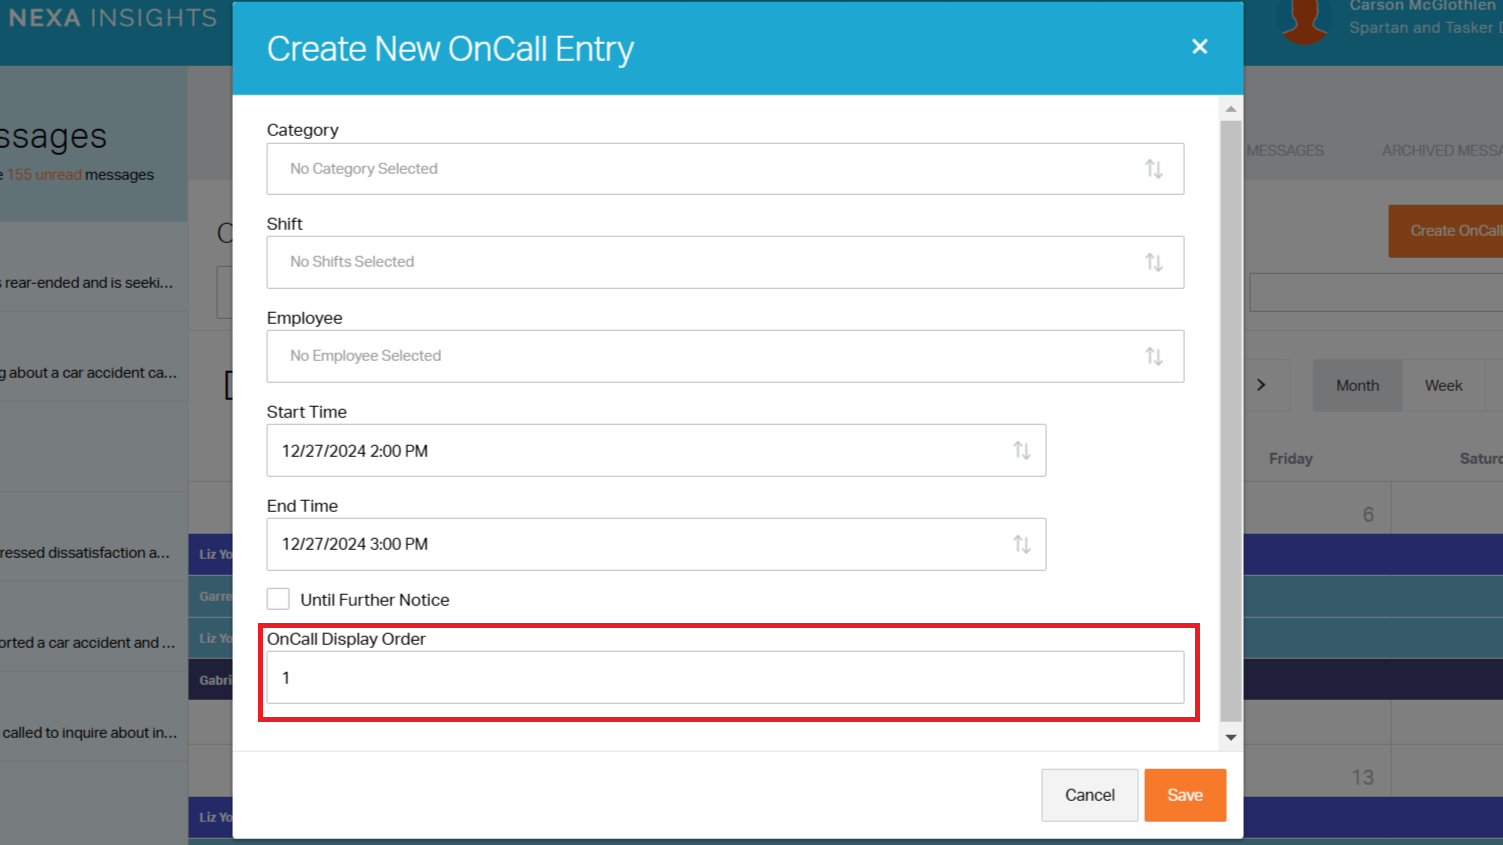
- If multiple people are on-call, adjust ranking accordingly
- Create a new on-call entry for each contact (i.e Backup, Mgr)
- Use Copy feature to create new shifts for additional contacts
- Use Copy feature to copy the same shift to a different date range(s)
THE ON-CALL PROCESS: STEP 4
Here’s what you need to do to modify an existing entry:
To change the entire shift:
1.Click on an existing entry
2.Complete necessary modifications & Save
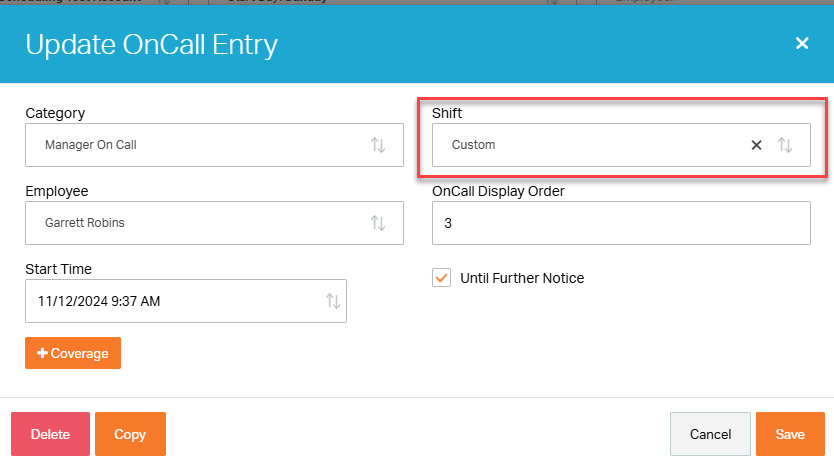
To modify part of an existing entry:(ex: apply coverage for a couple of hours instead of revising entire shift)1. Click on an existing entry2. Click +Coverage button3.Complete Coverage Slot Section & Save
- Reason
- OnCallEmployee
- Start time
- End time
4. Temporary coverage assignment will display under the existing entry
Extra info
- Administrative permissions can be assigned by a user
- For example: View only vs. editing capabilities
- Use Until Further Notice button to put an employee on-call indefinitely
Don’t forget!
- The contacts tab refers to CALLERS, not USERS
- Callers are YOUR callers
- Users are YOUR team with accounts
- If you need to add an on-call employee, contact customersuccess@nexa.com
Any questions? Check out our latest Youtube video to hear more info from Cameron Reichert, our Vice President of Customer Success.
Managing your own on-call calendar gives you instant productivity and control. Start enjoying the benefits of NexaInsights today!


